It's been a long time since I've updated this blog; many other things have taken precedence. I thought once the airplane was airworthy everything would be sweetness and flight, but I learned that it's far more complicated than that. In addition to learning about flying the aircraft, more work was still required. So instead of feeling relief and being able to relax, it felt like my workload had doubled. I want to get this blog caught up before I leave for OSH in two days. As a result I may end up skimming through all the things that have happened in the past months and breaking the work down into categories to simplify this post, but I'll try not to leave anything out.
The first thing to fix was that canopy skirt vibration. I had to put a notch in the canopy rail so that the canopy could be easily removed. Once it was off and in the canopy cradle, the inside of the canopy was polished and masked off. I affixed some D-section silicon rubber weatherstripping to the aft edges of the canopy to seal the gaps where the flutter occurred. The canopy was reinstalled, the fit was checked and some minor modifications were made. This would prove to be a good fix.
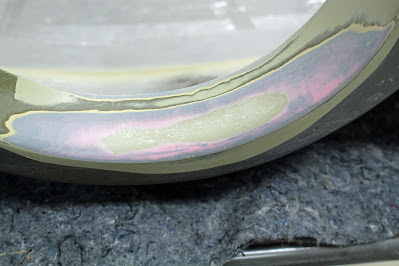
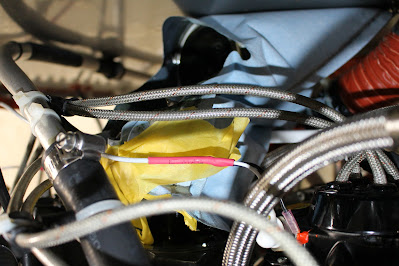
Post flight inspection revealed some additional oil leaks, including a loose oil return line fitting on the #3 cylinder which seemed a bit scary but I was told it wasn't uncommon. Oil was also oozing out from the fuel pump gaskets and there was also some oozing from the pressure sensors in the manifold block on the firewall which would prove difficult to diagnose. Inspecting the cowling revealed the source of the burning smell test pilot Dave Carrick had mentioned. Under G loading, the overlapping assembly areas of the two-piece spinner backing plate were rubbing on the bottom cowl nose bowl. I was worried that the damage to the nose bowl was significant enough to require replacement. After seeing my photos of the damaged areas, Whirl Wind assured me that it was insignificant and that the backing plate was still airworthy. I took the bottom cowl home, added some fiberglass to the inside of the nose bowl and sanded down the rubbed areas to increase clearance before smoothing and spraying with primer/paint. This was a process that I would repeat numerous times as testing continued. It is currently in the seventh phase of this modification and I wouldn't be surprised if I had to do more in the future. These are all the photos of the work done so far.
Another ongoing issue was with the bottom cowl hinge pins. The side pins didn't really require any retention, but the original design called for the bottom pins to be inserted from the inside out and safety wired in place. Clearance issues from the Vetterman 4-into-4 exhaust prevented this method of installation; the pins had to be inserted from the outside in. After pondering many different ways of securing the pins, I settled on making notches in the edges of the fuselage skins at the firewall that would retain the hinge handles without the need for covers or safety wire. During the notching process, the jewelers file would sometimes slip out and eventually broke, leading to large scratches in the paint job on the belly that required some touch-up. Further flight testing revealed that the right side pin would stay in place, but the left side pin would tend to walk out of the hinge. I tried flattening the handle end of the pins to increase the surface area, hoping that would increase the pressure from the airflow to hold the pin in the notch. That would prove to be inadequate and I ended up drilling safety wire holes in the pins and fuselage skins; the pins are now safety wired in place.
After some other minor details were addressed, the third test flight occurred on May 17. I prepared the aircraft, set up an aft facing mount for the Garmin Virb camera to view the canopy skirt and performed the preflight inspection. Meanwhile, Dave Carrick and his wife Emily were running a horrible border gauntlet that included a huge traffic jam and then being pulled aside for an enhanced search. They arrived in the early evening; Emily went shopping and Dave took the plane up for a successful third flight that lasted 48 minutes. We debriefed after landing; Dave mentioned some minor squawks but said that the canopy skirt issue was fixed and he was very pleased with the overall performance of the plane. He declared it safe and cleared me for further flight testing. I gave Dave a ride to the mall to meet up with Emily and thanked them both for their patience and generosity before returning to the hangar to complete the day's documentation. I ended up staying at the hangar late into the night, basking in the moment. This was a big day. After all these years of work, blood, sweat and tears I could finally take the reins of this beast and see what she was like.
After working on more squawks and preparing the aircraft, I made my first solo Phase 1 flight on May 23. It was relatively uneventful and I spent most of my time acclimating to the G3X avionics. I had intended to fly across my Phase 1 test area toward Greenville (6D6) but there were multiple broken cloud layers enroute and I elected to play it safe, turning back toward PTK and doing some gentle maneuvering that revealed more cowl rubbing. After landing, I noticed evidence of brake fluid on the cockpit floor that had seeped from fittings attached to the forward baggage bulkhead. I took the obligatory RV Grin selfie; Dave Pohl and Harry Manvel met me at the airplane and also took photos. The cowling was removed and the engine bay was thoroughly inspected; squawks were noted and action taken. This would become the trend for my Phase 1 testing: fly, check, fix, repeat.
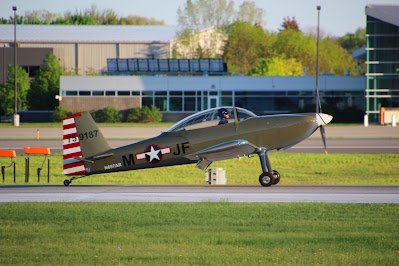
Flying off the required 40 hours of Phase 1 testing would take 33 flights over the course of almost two months. I had intended to follow the procedures set forth in the EAA Flight Test Manual precisely but I quickly learned that I needed to acclimate to the aircraft first. I found it difficult to collect data while learning how to fly the plane. I ended up capturing each flight on video, recording the tests and dictating the data verbally as I flew, then referring to the video in order to notate the results after the flight. Trying to describe the full process here would take me a month of writing and to be honest I'm not up to that task right now. Instead I'll share a very large selection of inflight photos and discuss some of the highlights as well as what additional squawks and maintenance items were addressed.


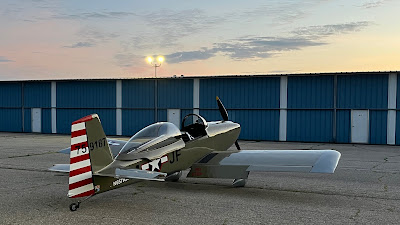
Some of the highlights encountered during Phase 1 were sharing the airplane with local EAA Chapters. The first one was at my home field; Chapter 194 at PTK. It occurred to me that this was my very first destination reached in the aircraft. I taxied for takeoff, flew in the pattern until it was time for the meeting, then taxied to the DCT Aviation maintenance hangar where we held our meetings. It was exciting to finally be able to bring this aircraft to a meeting and share it with my fellow members. I skipped the VFR/IFR Club portion at the end of the meeting in order to get more flying done before sunset. The video I captured that evening turned out to be too flawed to share here. Some of the flight photos were shared above and I'll include the following ground photos.
The next highlight was a spur of the moment trip to Mason (TEW) to attend the Chapter 55 Dawn Patrol Fly-In Breakfast. I thought this would be a casual event but this turned out to be my first proper airshow attended in the aircraft, which I found to be quite exciting. The weekend after that I flew into the Chapter 113 Father's Day Pancake Breakfast in Canton (1D2). I've been a member of that chapter for many years and had looked forward to the day when I could fly my own aircraft to this event. It was just as great as I'd hoped it would be. I compiled both of these events into one video; I'll include the link below the title photos.

RV 8 First Fly Ins
There were a few anomalies that came up during testing. On one cruise climb I was seeing high oil temps; not dangerously high but in the yellow arc. I orbited Owosso (RNP) and lowered power settings to try and lower the temps and they stabilized just barely in the green arc. As I headed back to PTK I realized what the issue was. It was one of the first hot summer days of the season and I had forgotten to remove the oil cooler shutter that was left in place during the cold spring. I landed, pulled the top cowl, removed the shutter, replaced the cowl and made another flight; the oil temp was about 20° lower on average. One evening I got my hangar neighbor Eric Kirkwood to capture the first ground-to-air photos of me doing a low approach in the airplane. As I pulled up to continue the pattern work, there was an unusual vibration; I couldn't feel anything but I could hear it over the noise-cancelling headset. I landed and taxied back to the runup area. Another runup revealed no vibration, but as I left the ground for another circuit it came back strong. I aborted the takeoff, went back to the hangar and shut down. Eric and I looked over the aircraft and didn't find anything, but the next morning I found the problem. The wing fairing gap seal on the right side had started coming off and flopping around in the slipstream. It was simple enough to refit the gap seal. Each wing fairing seal was made up from two pieces; PVC tape was placed in the areas where the two pieces were joined. Eventually both 2-pc. seals will be replaced by longer single pieces which should eliminate the possibility of it coming loose.
Those were two easy fixes; others weren't so simple. My fuel tank drain valves proved hard to reseal; sometimes it would take numerous tries to get them to stop dripping. Since they had sat in boxes for many years before getting installed I suspected the O-rings were perished. I decided to order two new drain valves just to be safe. I flew the aircraft until I had less than five gallons left in each tank. I had to transfer fuel from one of my 15 gallon jugs into my 5 gallon jugs before draining the rest of the fuel from the wing tanks into the mostly empty 15 gallon jug. The valves were replaced and the wing tanks refilled with all the stored fuel in the jugs. During that process, one of the tethered nozzle caps from a 5 gallon jug broke its tether and fell into the wing tank. It was a pain but I was able to retrieve it. Problems fixed; flights resumed.
The flight envelope was gradually expanded and the capabilities of the avionics explored. Early in testing I had gotten indications that the signal from the magnetometer was intermittent. I suspected a loose Sub-D connector and dreaded the possibility of having to reach into the tail cone to try and fix it. But the problem seems to have gone away on its own. The basic autopilot functions were checked on the ground and dialed in during flight testing. I've learned how to download the flight data logs to my computer as PDF files but have not thoroughly explored the best ways to translate the data into something I can find useful. I still have a lot to learn about my avionics and their immense capability, but I have gained a reasonable amount of familiarity with the system.
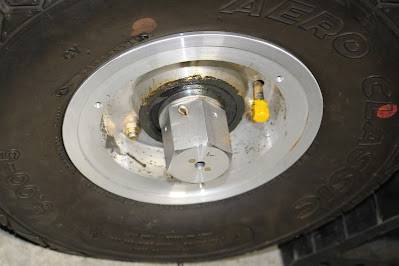
As the hours accumulated, more squawks were found and corrected. Early in testing the main wheel bearings were slinging grease. Research was done on the issue and some solutions were presented. Some permanent solutions are very costly and possibly unnecessary; it might just have been excess grease being extruded past the seals. The expelled grease was wiped off and the bearings monitored; so far, so good. The oil filler tube had loosened up twice; the gasket was replaced, the tube was tightened and safety wired again; so far it has remained tight. Oil and filter changes were done at 12 hours and 26 hours; no anomalies were found. The engine break-in turned out to be a non-event; the engine oil consumption has been low from the start and cylinder head temps have stayed in range and stable. I'm told that the engine may have been broken in during Barrett's dyno runs; in any case the engine seems happy. Despite being tightened further, the sensor manifold block oil leaks continued to be an issue until all three sensors and one Allen head set screw were removed from the manifold block, cleaned, resealed and retorqued.

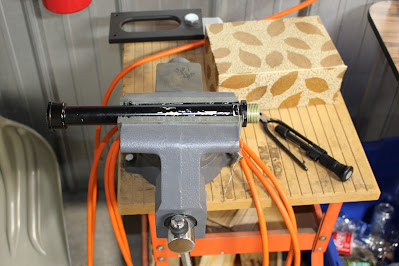

The brake fluid leaks inside the cockpit were examined from the cockpit and with the forward baggage floor removed. They proved to be intermittent, difficult to diagnose and impossible to duplicate. The brakes work fine; I've seen no further evidence of seepage but will continue to monitor the situation. One improvement I did make was to wrap one potential area of chafing on the brake line with split electrical conduit for protection.
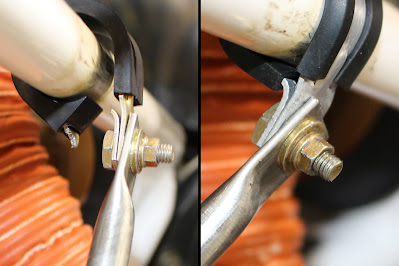
One recurrent issue led to an attempt at a redesign. I followed the installation instructions for the exhaust pipe support bracket tubes supplied by Vetterman Exhaust. Early in the running I discovered one of the Adel clamps that held an upper support tube had broken; it was replaced. During a later condition inspection I discovered that both upper support tube Adel clamps had broken. I check the security of the exhaust pipes during every preflight inspection and they always feel secure; even without the support bracket tubes attached the geometry of the assembly holds them firmly in place. The breakage was probably caused by the engine shaking during startup. I conferred with Mike Hull and Curt Martin and came up with a sprung support system for the pipe assembly that would provide the necessary flexibility. The system was installed and tested; a video camera captured the results. It seems to work as intended and subsequent inspections reveal no further issues, but it will be checked at regular intervals.
One long day of flying on July 3 wrapped up Phase 1 flight testing. I zig-zagged my way across my test area, experimenting with the autopilot and accumulating cruise data and practicing slow flight and maintaining the OSH approach speed of 90 kts. As I returned to PTK I stayed in the pattern, practicing spot landings until I reached 40 total hours. I called for a termination and thanked the tower for all their help as I cleared the runway. I tucked the plane away, headed home and made the appropriate logbook entries for Phase 1 completion and aerobatic testing. The next day I returned to remove the cowling for more rubbing repairs, wash the plane and give it another thorough inspection. The wheel fairings were temporarily installed for the showing at the Chapter 194 meeting and the evening flights. I had noted that the aft tire clearances were much tighter with the aircraft on the ground than they had been when the aircraft was suspended and leveled for fabrication. I could hear the sidewalls rubbing the fairings when the tires were subjected to lateral loads. I had intended to leave the fairings off for the duration of Phase 1 testing so they were removed the next day. Upon removal I noted that the gel coat in the mounting pad area for the left forward fairing half was beginning to crack where the mounting screws had pulled the surface inward. The pad needed to be built up and redrilled. With Phase 1 done it was time to get the modifications done and reinstall them. This was the first time the center mounting bolt would be safety wired; it took a bit of doing to figure out the logistics. A few more minor issues were addressed; the tailwheel chain aft clips had gotten sideways so they were straightened and safety wired in place. I also bought two folding steps for Amy to use when boarding and checked out their functionality and fit in the forward baggage area.
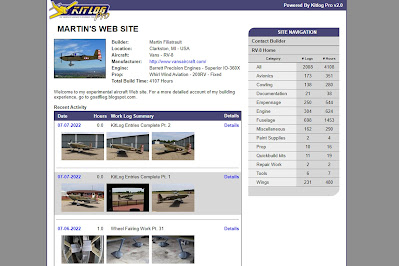
With the end of Phase 1 came the end of another era: the completion of the KitLog Pro build log and the final MyKitLog online post. After 4108 build hours and 2008 total entries, that was an important bit of closure. I'm grateful for all the assistance Matt Dralle of Matronics gave me over the years with my build log, as well as all the inspiration and advice he provided through his own RV-8 build log. It was a relief to know that I didn't have to worry about that extra level of documentation any more. Any further work done on the airplane is now considered maintenance or modification and will be noted in the appropriate logbook. Regarding maintenance, I finally got around to contacting the FAA East MI FSDO and filled out the application for my repairman certificate which was approved and I received my temporary copy; thanks to Bruce Arthurs and the rest of the East MI FSDO team for their help.
I made one more solo flight before achieving another long-standing dream: Amy got her first ride in the RV-8! We practiced the ingress and egress the prior evening, using the steps and working out a routine. It wasn't easy, but it was a simpler process than I thought it might be, and most importantly it could be done. We went up for about an hour, up to the tip of Saginaw Bay and then back. Amy loved it, and I loved having her along for the ride. We've discussed some improvements; the aft seat is very low and we'll get a booster cushion to improve visibility and mobility. I really want to get her a noise cancelling headset, but Bose is out of stock right now so they'll have to wait. We're already planning trips; a whole new level of travel and exploration awaits us!
There are a couple more aviation adventures I wish I could share in this post: my recent trip to the Canadian Aviation Museum for the unveiling of the FlightChops RV-14 in its new Yellowbird livery and my Close Call in Marlette involving deer on the runway. But those accounts will have to wait. This post took forever to write; it's after midnight now and I'm planning to leave for OSH within the next 36 hours. The NOTAM and arrival videos have been studied; my gear is gathered; lists are written and I've been living out of my packs for the past two days to make sure I haven't forgotten anything. I'm hoping to get the aircraft packed tomorrow and practice a few fully loaded spot landings before topping off the fuel, doing the preflight again and heading home for more study of the NOTAM, the weather and the flight plan before launching as early as possible on Friday morning. I have big plans for this trip; it will be the most important AirVenture of my life and when it's in the books I'll get back to this blog and tell you all about it and more! STAY TUNED!


