At the end of last month I had a shop heater installed. It appears to be a standard ceiling-mount space heater, but the flue pipe is actually surrounded by an intake pipe, so the burner tubes can draw air from the outside, making it much less likely to ignite any combustible fumes in the room. My paint booth should have very good ventilation, and the heater will be outside the confines of the booth... but I will still make sure the heater and any other ignition sources are off before any painting is done.


I want to make sure I have the optimal amount of space ready for unpacking the big quickbuild crates when they get here, so I started out by cleaning out the shed section of the garage to make space for the paint booth frames I had just fabricated.

The next step was to move the Toyota wagon into a vehicle storage unit at the local storage yard. I was fortunate to get the very last one they had available. The motorcycle will be stored inside its trailer during the winter, so that will also be out of the way. I made space for the lawn tractor in the main house garage, and I put the gardening trailer up on blocks in the back yard and covered it with a tarp. Then it was time to go through all the miscellaneous house stuff on shelves and move most of it up to the loft to free up shelf space for parts. Now I've got the room I'll need to make unpacking much easier, and the woodworking tools are right by one of the garage doors for quick access, since I prefer to cut wood outside to keep the garage cleaner.


One valuable lesson I learned from the Sherwin-Williams Training Course is that I needed to rethink the air flow in my booth design. I originally thought I could draw air from the gap in the top of the main shop garage door created when the fans are in place. But I realized I would probably end up drawing in fumes that had just been expelled by the fans below. So my incoming air should be coming from the opposite side of the building. That can be easily done by using the entry door to the shed as my input air source, as it is directly across from the garage door/exhaust fans. I considered cutting out the sculpted panels of the door itself and covering the openings with filters, and augmenting the flow with additional filtered ports in the wall and adjacent loft door. I also considered mounting a separate screen door to the outside of the main door frame, but rejected that idea because it wouldn't filter the air well enough. After examining the door frame, I realized how easy it would be to build a plug wall with large filtered ports that would fit into the door frame notch. So I got some plywood, trim moulding and filters and got to work. It took some figuring, but I'm happy with the result. It installs easily, fits well and should flow more air than the exhaust fans will pull... and best of all, the original door is still intact.


My initial test-fit of the paint booth frame sections showed me that things would get pretty tight in the main shop unless I rearranged things, so I decided to move the wing stand and empennage stand to one of the garage bays. Since the man-doors are too narrow to accommodate either stand, this meant taking them outside through the main shop garage door and around to the other side of the building. The wing stand already had large casters that could roll on the lawn outside, but the empennage casters were way to small to handle that transition. I really didn't want to go through the hassle of disassembling and dismounting the whole empennage if I could avoid it. So I improved the main undercarriage by mounting a separate axle onto the base of the stand that would accommodate wheelbarrow tires. The wheels are held on by bolts that fit nicely into the axle tube fabricated by black pipe sections. It came together fast and worked like a charm. For the first time since birth, the empennage left the nest!


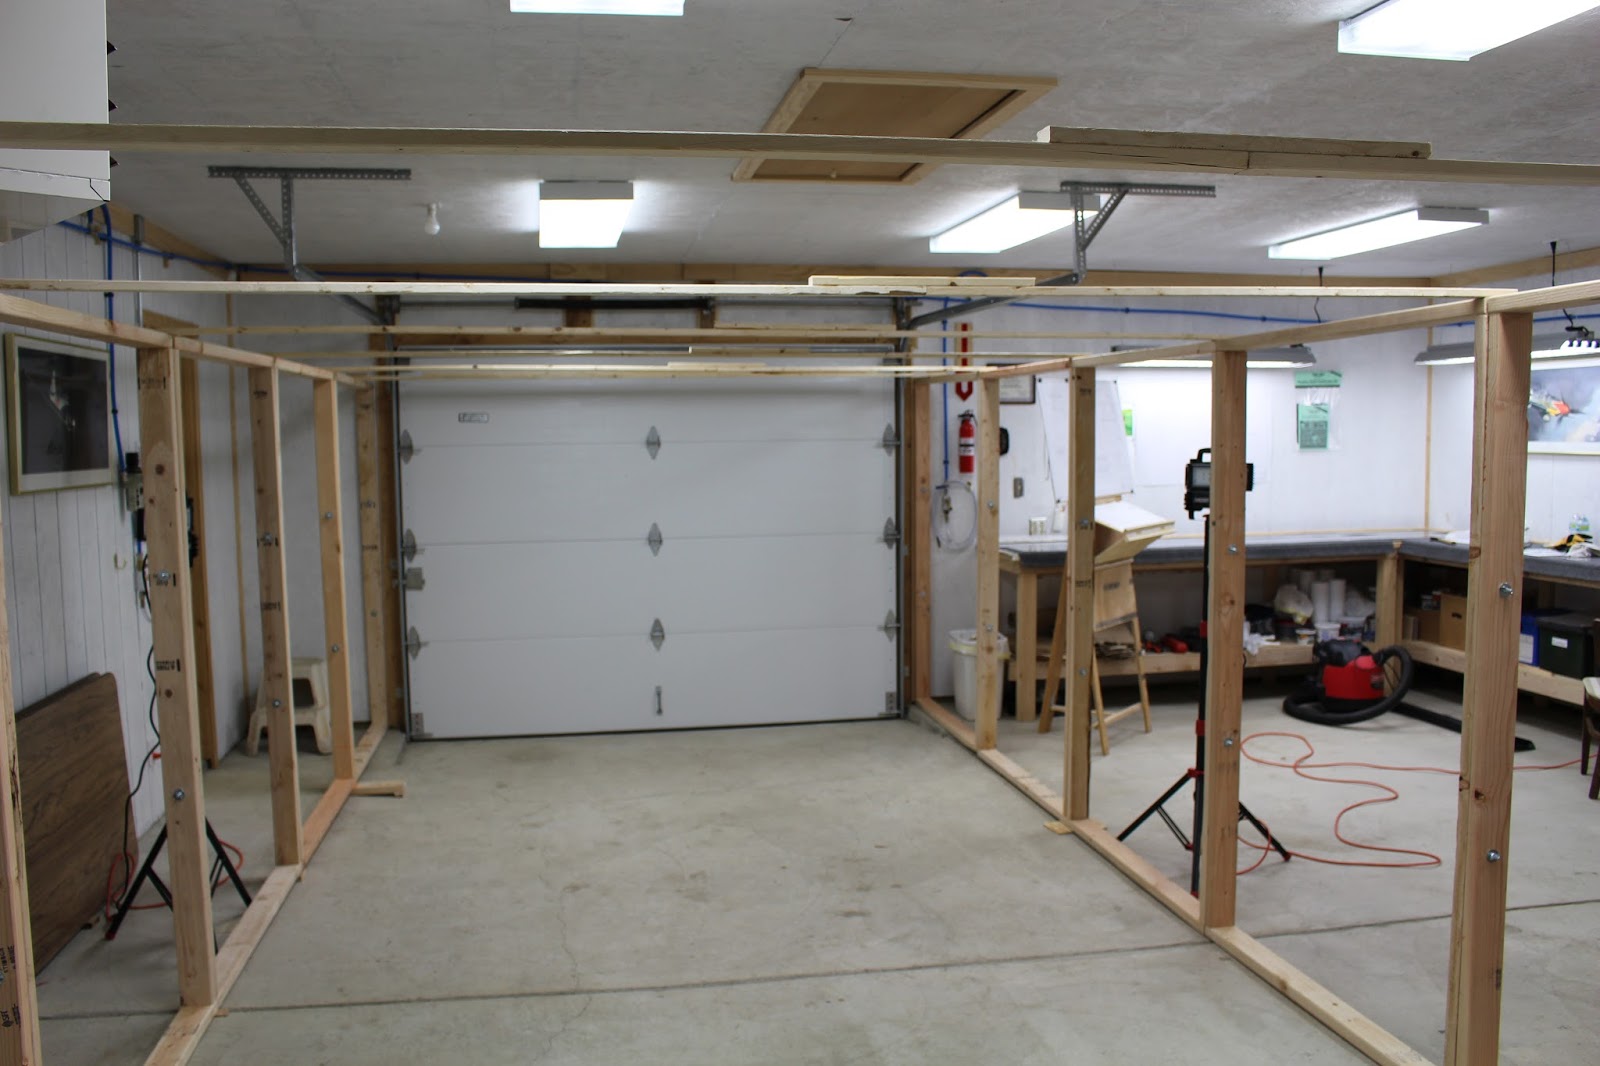
Back to the paint booth. I did another preassembly on the paint booth components, adding bracketry and fabricated ceiling slats. It's shaping up rather well. The interior dimensions are about 24' x 10.5', and I think I can make that work for me. Since it's modular, it will be easy to expand if necessary. I also tried out my new portable LED shop light stands. I've been told that you can't have too much light in a paint booth. Time will tell if this will be adequate.


Next is a full fitting of clear visqueen with the fans and garage door gap seal in place. I got some sheet aluminum cut to fit the gap; I've got to figure out how I'll secure it so that it's fairly air-tight. Then it will be time for airflow testing. I got a new DeVilbiss paint gun with accessories, and I've also contacted the closest Sherwin-Williams rep and discussed what paint colors and other supplies I'll need. When I'm geared up and ready to shoot, I'll start out by using the gap sheet as a practice piece, painting it in the aircraft colors of olive drab and neutral gray, with a mid-1943 Stars & Bars painted in the center. More to follow...