The last two month of this year weren't as productive for me as they could have been; there were a lot of distractions that caused gaps in my work timeline. Lots of house work, including a faulty condensate pump on my furnace that caused a two-day water leak problem. We had events to attend, such as family parties, concerts, a couple gigs, trips to Ashland KY for a Thanksgiving family gathering and Indianapolis IN during December for comedy shows. There was a lot of winter prep to do that included moving vehicles and furniture to the hangar for storage. I maxed out my desktop computer in both capability and storage which led to the purchase of a new laptop and the long process of setting it up. I did a fair amount of flying from September to November which culminated in my first solo flight in about 14 years. My engine and prop assemblies were both delayed and current production is now expected sometime in January or possibly February. We're currently in the deep freeze affecting most of the nation and although the main shop is heated, I've been distracted by snowfalls and maintenance so frequently that I just haven't made it out there as much as I should have. With all that, plus continuing disruptions in my sleep patterns, it's been easy to fall into the mindset that by the afternoon all I wanted to do is have a couple beers and relax the rest of the day away, and I did that frequently.
Despite all that, I did manage to get some stuff done. The Vetterman exhaust arrived when expected, and the finish kit arrived in good condition a few days later. Inventory and crate disposal used up a couple more days. All arrived in good condition, but I was surprised that a few of the bags included rivets that needed to be sorted. That can be a pain, especially when dealing with small flush rivets that are very close in length. But I got it done.


I finished up the backboards used for bucking the aft fuselage top skin rivets. This was complicated by my wish to keep the pitch servo and elevator bellcrank installed. I had to build a box to surround the assembly, but in the long run that was far easier than removing the components and reinstalling them after the top skin was in place.


I did receive my rudder cable idler arm parts with the finish kit. As with most powdercoated weldments, they required some fitting work, and the gear tower weldments had to be drilled for the extra bolt. I had also ordered some slightly shorter replacement bolts for the assemblies because I wasn't installing the aft rudder pedal extensions, but somehow I ordered undrilled bolts. These assemblies require castle nuts and cotter pins, so I had to order drilled bolts. Not worth sending back the undrilled bolts, I'll just throw it on the proverbial pile of nickels and dimes. I was happy with the result, though.


I began working on the aft top skin. I had received the replacement shoulder harness anchors, and this time I filed the reliefs for flange clearance on the correct sides. I clecoed the aft bulkheads, gussets and other parts onto the fuselage, clecoed the aft fuselage skin in place, clecoed the shoulder harness anchors in place, and final-drilled all the #30 and #40 holes in the skin, bulkhead flanges and other parts. Then came disassembly, deburring and dimpling. The #30 holes in the top skin for riveting the shoulder harness anchors had compromised access that required ordering a set of #30 close-quarter dimple dies from Cleveland Tool. Actually, it required two orders. The first one was shown by the post office as having been delivered; I don't know what happened, but I never received them. Cleaveland Tool was very gracious about it and sent me another set right away, free of charge. If I ever do receive the other ones I will definitely send them back to Cleaveland Tool, but that kind of service will keep me a loyal customer for a long time. Despite the small delays and the awkward access using the dies and rivet puller to set the dimples, I managed to finish that portion of the job as well as machine countersinking the shoulder harness anchors.


While waiting for parts (and replacement parts) to arrive, I skipped around to other jobs that could be done. One such job was completing the brake lines in the fuselage using the parts that arrived with the finish kit. As it turns out, I wasn't missing as many parts as I thought. Van's had told me that some elbows were coming with the finish kit, but I later learned those elbows had been supplanted in the kit with push-to-lock fittings that I had in stock. This change was not reflected in the plans or instructions; I'm not even sure it was on Van's radar until I pressed the issue. That's ok; at least I got the correct information eventually. I started the work on the bench and finished it with the pedals installed in the fuselage. I think I'll eventually need to refine the way the lines are run to avoid chafing and interference and make the lines as secure as possible; more on that later. Running the hard lines included the joy of working blind inside those wonderfully awkward gear towers. I also continued research on how to plumb the brake lines onto the Grove airfoil gear. There are a lot of different ways to address this issue; I chose one as a starting point, did some tube-bending practice and fabricated some lines that might do the trick. I'll know for sure after the gear is installed in the fuselage.


Another small but critical job was getting the hole drilled in the front spar of the horizontal stabilizer to allow routing of the manual elevator trim cable. I had to dig out the empennage plans, find the correct blueprint page and photo/copy the layout specs, bring the horizontal stabilizer in from garage storage, make up layout templates and get everything prepared... two hours of preparation just to drill one hole. Just another typical airplane building task.


One job I was looking forward to was getting the windscreen support rollbar fitted to the fuselage, but this was another example of having to fine-tune a weldment. When the support was put in place it fit loosely side-to-side and the triangulated gusset plates didn't lay flat along the cockpit rails. The steel rollbar hoop was much too stiff for me to bend by hand, so I sought some advice from Van's builder support. After discussing various methods of bending the bar to spread the mounts into position, I came up with a way to use my cherry picker for the job. I secured a chain around the base, wrapped tie-down straps around either end of the hoop and secured them to the lift hook and base chain. Gradually extending the boom pulled the hoop apart. I would stretch the bar and relax it, taking measurements each time until the relaxed hoop met the required dimension. This procedure worked so well I shared it on the VAF site. I was able to tweak the triangulated gussets slightly by clamping one end to the C-frame table and pulling the hoop upward to flex the gussets. Once all the mounting holes were drilled, it bolted down nicely.


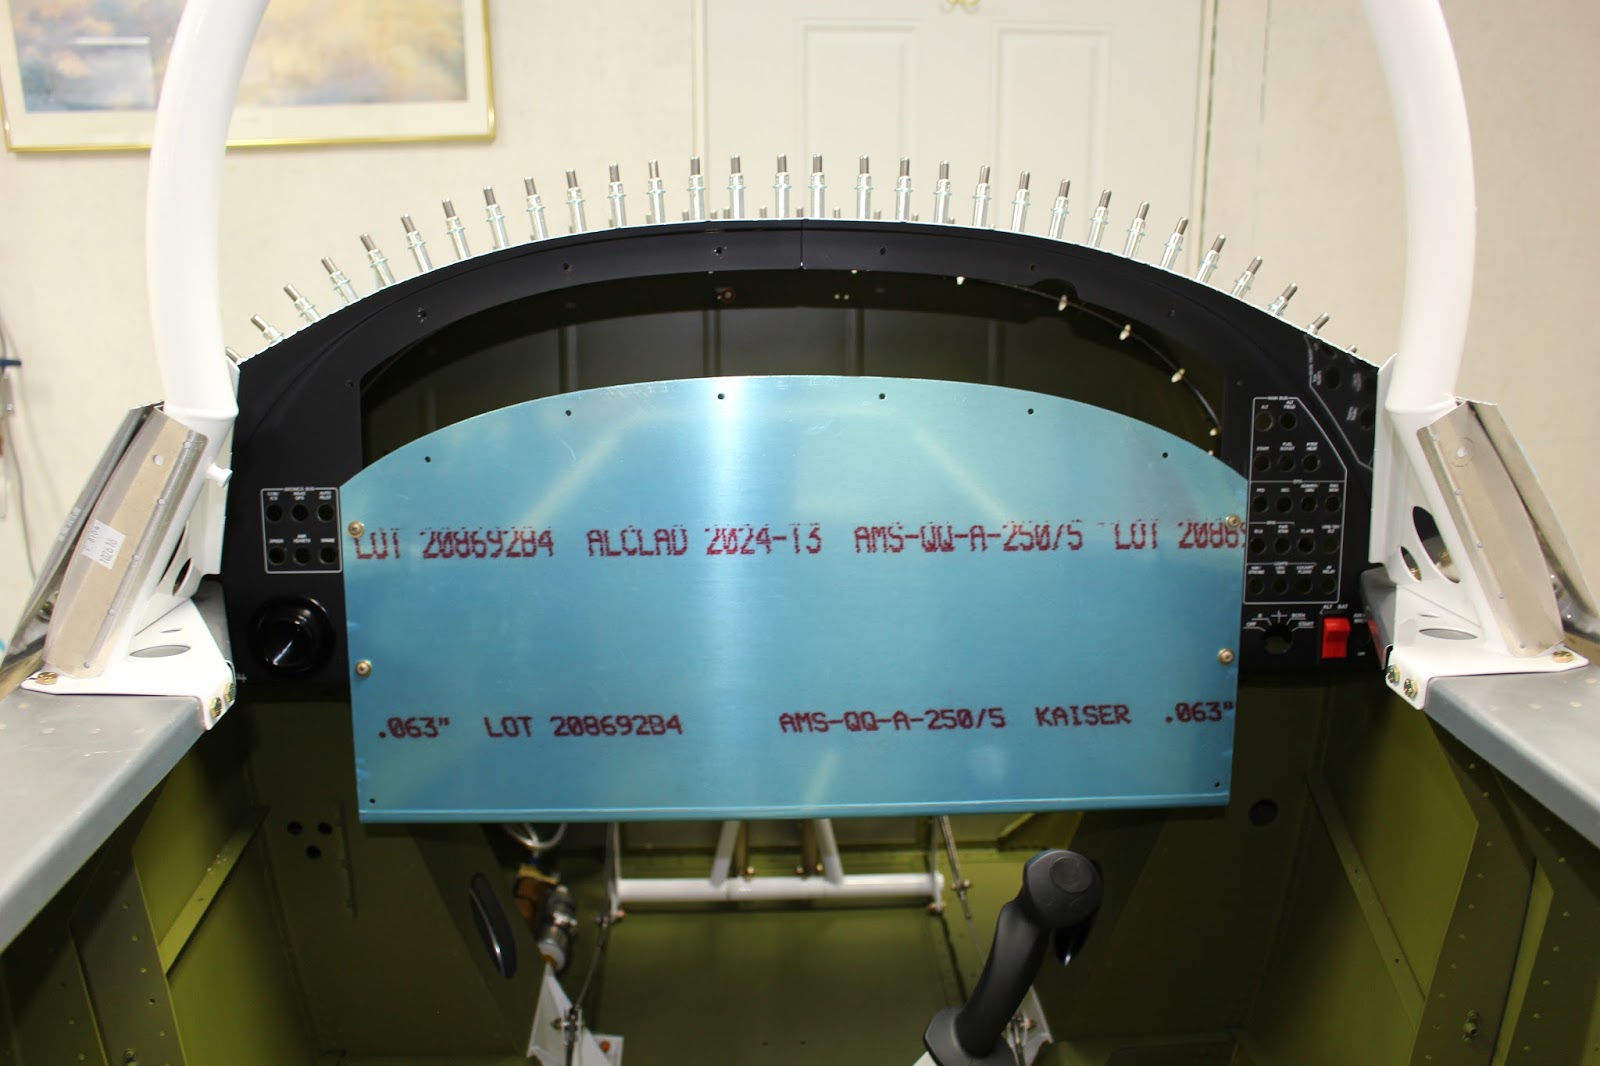
From there I turned my attention to the initial fitting of my instrument panel. It was finally time to unwrap the beautifully finished Aerotronics panel from its cellophane cocoon and face the daunting task of figuring out what disassembly needed to occur in order to get the subpanels to fit in their places on each fuselage side. The longeron flanges prevent the panel from being fitted without some dismantling, and I called Jason Smith at Aerotronics for his advice. It wasn't as difficult as I had feared; I had to remove the circuit breakers and ignition key from the subpanels and disconnect the master and avionics switch wires, then carefully detach the center panel, lifting the freed subpanels up and away from the wired center panel and the detached circut breaker clusters. In order to keep the detached instrument panel safe and stable, I made up a table jig that would hold it all securely and make it easier to move about. Then it was rewrapped in a new cellophane cocoon and set aside.


The slots in the subpanels that fit around the longeron flanges needed some massaging, and I winced as I filed some additional clearance into the finished and painted parts. Eventually the subpanels fit properly; the lower mounting tab holes were final-drilled, deburred, dimpled and clecoed in place. I had to order a second blank instrument panel to keep the subpanels properly aligned during fitment of the forward top skin. Since I would only use it as a jig, I kept the protective plastic wrap in place so that I could return the unused and undamaged panel for credit later. It was fun to cut the gap panels out of the forward top skin and get it clecoed to the firewall and bulkheads and panel for the first time with the windscreen support in place; although temporary, the plane made an immediate leap forward in appearance.


There were a couple other side projects that also took place during this time. I had to fabricate the nut plates that will attach to the aft bulkhead gussets for stowing the tie-down rings in the aircraft when not in use. I started by making a jig out of aluminum using the gusset plates as templates, then fabricating the actual nut plates out of welding steel strap stock. I brought the plates and correct size nuts up to Leo Knowlden's home shop and he tack-welded the nuts into place on the plates. Now all the aft top skin components are fabricated and deburred and await prepping, priming and painting prior to assembly. The other side project was to box up and return the unused fiberglass gear fairings and hinges to Van's for credit on my account.


Back to the forward top skin. Final drilling, dimpling and deburring of all the associated parts went well, although cleaning up the edges of the top skin was a bit of a chore. Once that was all done the skin was clecoed to the firewall, bulkhead, subpanel flanges, support ribs and baggage door supports and hinge support.


Now it was time to work on the baggage door. Fabricating the latch pins out of tube stock was the first step. I was tempted to have the required slots, holes and rounded shoulders done by a machine shop for perfect accuracy. But it only took a few minutes to chase those thoughts out of my head and get down to doing it very carefully by hand. It didn't take as long as I thought it might, and resulted in satisfactory parts. Assembling the skins and ribs was another fun part, figuring out how the parts pull and nest together. Disassembly and deburring parts was tedious as always, but it seemed to go well. I cut the door hinge to the correct length, clamped the door side half between the skin and frame and match-drilled the holes. Then everything was disassembled again, awaiting dimpling and countersinking before being set aside for prep, prime and paint.


That's pretty much how the year ended. The last big project of 2017 was getting the new laptop configured. The trickiest parts were getting iTunes and KitLog Pro set up properly, but I'm proud to say that after a lot of research and care, the new laptop is pretty much ready to see me through the next bunch of years... I hope. I've already done the first test post to my KitLog page, and it looks good. So this may be the last post I write on this old desktop. We'll see.

With the completion of this blog entry, I think I've finally run out of administrative tasks, house chores and holiday distractions. Now if you will excuse me, I must get out to the shop. I have an airplane to build.