After completing inventory, I modified my wingstand for a better fit. I added a wider spar shelf, about 3" lower and 9" inside of the original. The test fit went well, so I went ahead and anchored the slings and trimmed the excess.


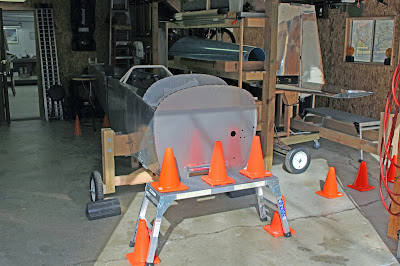
Now I had to address my requirements for a fuselage stand. The work stands were suitable for stationary support, but I knew I would need to be able to move the fuselage around by myself, both inside the shop and from the shop to the garage bays. I don't have a paved driveway leading to the shop garage, so the stand would have to have wheelbarrow tires to handle the rough ground between the shop and garage doors. I planned another cruciform design similar to the empennage stand, using the plywood inserts in the spar pockets as the main mounting points and a carpeted platform located underneath the passenger seating area to provide aft support. Instead of a long axle, I would use long wheel bolts mounted through holes drilled in 2x4 axle blocks. I didn't think a tailwheel caster would be required, so I just made a braced tailskid block sized so that the fuselage would sit level in the stand. Using 2x4s for the main frame and platform braces would make it simple to attach the platform to the frame with vertical supports on either side. Once the main frame was finished, I needed to raise the fuselage 10 inches, roll the stand underneath and gradually lower the fuselage, fitting the plywood inserts into the slots in the stand. It took some experimenting with my cherry picker hoist and some tie-down straps to figure out the safest way to do the lifting, but I did manage to raise the fuselage and get it resting in the front of the stand, with the tail temporarily supported. I disconnected the hoist and removed it, then carefully lifted the tail to find the position where the fuselage was sitting evenly in the stand without putting any torsion on the plywood inserts. Once that sweet spot was found, I supported the tail to hold it there, strapped the platform to the fuselage bottom and secured it with 2x4 vertical posts that sandwiched the main frame and platform frame using glue, screws and clamps. The next day, I removed the clamps and tail support and was pleased to see that the fuselage sat level in the stand. It was at the same height as it was on the work stands and was easily moved about by hand from the tail.


With the stands complete, it was time to rearrange things and prepare for wing work. I had a beautiful day to do this and Dave Farquharson was available to help. I couldn't resist the opportunity to get some outdoor photos of the main aircraft components in a group.


We got the tables set up in the shop and transferred the wings back to the tables. The fuselage, empennage and wingstand were nested into the garage bays, and everything was covered for storage.


I also reached another very special milestone last week: I am now an airport tenant. That's been my dream for many decades. I did have airport access when I learned to fly at PAO and when I was a fuel tech at SJC, but it's been a long time since I had free range access to airport grounds, and I've been missing it a lot. Training with DCT at PTK helped ease the longing a bit, but I found out the hard way that the other tenants around DCT are very intolerant of anybody walking on their sacred ramp space, and I didn't have gate access to the other GA areas. But once I got the QB kits in my possession, I was able to get insurance, and with my N-number reserved, proof of kit purchase and insurance, I was also able to get a hangar lease. I know it will be awhile before the aircraft is there... but I didn't want to take the chance on availability, so I went ahead and jumped at the opportunity. It's a great feeling to know that I'm finally and officially an airport insider, and will be for the rest of my life.

The prep work is done; now it's time to get back to building this bird. To be continued... until complete!
No comments:
Post a Comment