Since my last post, the gyrations of our roller-coaster life became more intense until the chaos reached a crescendo and suddenly the ride ended, leaving us feeling devastated and drained. It took some time for us to readjust and get back on stable ground, but we have our life back now and are beginning to catch our breath. Through it all, I tried to keep moving forward on the build.
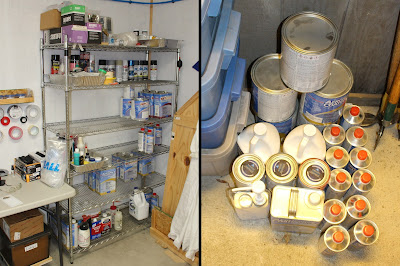
After a final test fit of the wheel and lower intersection fairings, they were removed and put in storage. It was time to prepare to paint the fuselage. The shop and garage areas were cleaned and reorganized. Expired paint stock was removed and when added to the previously discarded stock, the total collection of expensive and useless material was both impressive and depressing. New paint was ordered as well as other booth supplies. Then the fuselage needed to be pulled out, turned around and put back into the shop with the tail facing the garage door.

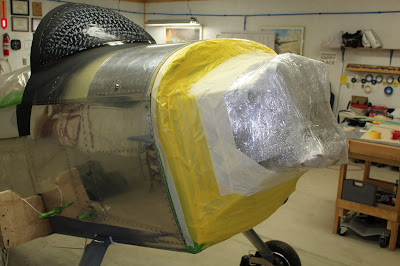
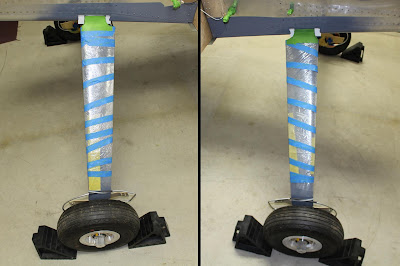
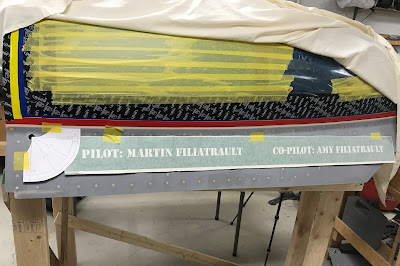
With the fuselage turned around, it became apparent that I had a rather sizeable problem. Knowing that in its usual form, the ceiling of the paint booth came just below the bottom of the space heater, I could tell that the windscreen would just barely fit underneath it... and that left no room at all to be able to paint the molding over the top. I pondered the situation and briefly considered using this as an excuse to have the fuselage and wings painted at a different location. But after discussing it with others, it became evident that I would be better off modifying my booth. How I would go about doing that would be worked out later; the next step would be masking the fuselage for paint. Firewall forward was covered up with plastic wrap and layers of tape. After trying unsuccessfully to reinstall the cockpit cover I had previously made, all cockpit masking was removed and redone using cardboard for the forward plug. A two-layer lamination of butcher paper was used to cover the cockpit with an added layer of plastic sheeting for water protection during metal prep. The vent opening and inspection plate openings were covered and taped in place. The canopy notch was covered and masked, along with the canopy rail. The gear legs were wrapped in plastic. For the tail section, the tailwheel spring was wrapped with plastic wrap; the flat surfaces were covered with butcher paper and tape; antennas were wrapped and a tailcone was fabricated out of tape to mask the aft bulkhead. The baggage door was removed; the opening in the fuselage was masked as well as the inner surfaces of the door. The windscreen perimeter was remasked with two layers of electrical tape. Later on, I boxed in the main wheels and wrapped the tailwheel and the shorter jack stand holding the tail up.
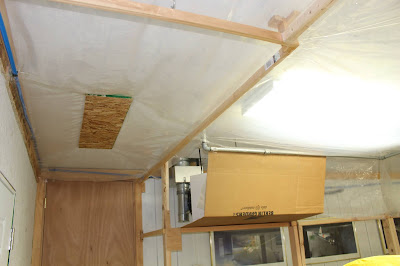
Now for the paint booth. Erecting the main frame components confirmed the need for an upward extension but building it would be tricky, especially since the heater box would be an obstacle on one side. Looking at the layout of the original design, it made sense to extend the entry tunnel framework attached to the ceiling to raise the booth ceiling over the windscreen. Instead of using wood, I chose to use galvanized pipe that could be easily assembled to the correct dimensions and hung from the ceiling using pipe mounting pads. I assembled the pipe components into sections and, working around the fuselage, very carefully mounted the sections to the ceiling. This was both fiddly and nerve-wracking. I had to temporarily suspend the framework from galvanized strap sections and complete the assembly before screwing it to the ceiling and east wall. Some of the straps were too short to allow swinging room of the legs and pads; longer straps were put in place and some pads were removed and reinstalled before I had the framework correctly positioned for anchoring. It occurred to me that maybe I should have used PVC pipe instead, but I knew all along that the increased rigidity of the galvanized pipe would pay dividends when it came to hanging the plastic sheeting. With the framework up, I installed the fan unit in the garage door opening and Leo Knowlden helped me lift the large plywood plug into place with the plastic sheeting already attached to the outside surface. The outside baffles were assembled and covered with plastic.
I had put out a call to my builder network for an airbrush artist for my nose art who might also be able to help with the entire painting process. Ted Gauthier, Dave Pohl and Leo Knowlden stopped by with John Stahr, a well-known artist in the aviation community who does absolutely fantastic aircraft paint designs. He is based in Oregon, but travels the country doing custom work. He had done the airbrush work on Leo's RV-10 and happened to be in town when I made the inquiry. I showed him the aircraft and discussed the nose art design I wanted as well as the possibility of having him paint the wings in his Caro, MI work location. We talked methods and materials and reached the conclusion that I would probably be better off doing my own painting in my own facility. He said aside from the space limitations, my paint booth was a better working space because the ventilation was better than he had at his Caro location. He could add the nose art later if our schedules could be coordinated. I'll share a link here to his website; it's worth a visit. Spectacular work; especially his own RV-8: Artistic Aviation
After putting in two long days of booth assembly, my back decided it wasn't happy with the pace... and this flared up just a few days before Amy had back surgery, so work slowed a bit. I had received my masking stencils from Quality Business Engraving experimented with some of the graphics placement. I had also forgotten to make up a stencil for the canopy latch, so I designed it with the help of Mike at QBE and he sent it to me a few days later.
Work continued on enclosing the booth during periods when I wasn't lying on an ice pack. The enclosure took a lot longer than expected; it took a while to figure out how to tie in to the older structure and seal all the different angled areas. I also tried a different way of assembling the pass-through between the booth and the main shop, using several wide strips of plastic interlocked and draped. Testing with the fans on revealed it to be a complete failure; the overall design was also compromised by the vertical expansion. I ended up trimming off most of the drapes and fabricated a door panel that would be held in place with wall cleats, hanger screws and wing nuts. This would provide a firm smooth surface for the remaining drapes to seal against.
The new shape required more lighting. I bought some inexpensive LED 4' strips to supplement the lighting I usually use. I only hope the main breaker can handle the load of all the lights, fans and the air compressor. Having the breaker trip in the midst of painting would be a disaster!

One big regret I've had for a long time is that I didn't spray the forward end of the fuselage bottom while I was painting the rest of the bottom. My thought process was that it would be easier to blend in the coats on the fuselage and cowling if those areas were shot at the same time. That plan was flawed; as it turns out it's impractical to shoot the cowling and fuselage together for numerous reasons. Prepping and painting that forward bottom section will be a major pain, but it must be done. To help facilitate that, I purchased an Aerocreeper articulating mechanic's creeper. There are a lot of articulating creepers out there and the price range is wider than you would expect. Some are overpriced and some are almost certainly too good to be true. The Aerocreeper is one of the more expensive ones, but it's the most robust and simple. I had planned to get one for over a year now, but didn't want to face the expense until truly necessary. It will be a good investment, as it will be used frequently during assembly and condition inspections for many years to come.
I boxed in the main wheels and masked off the tailwheel and jack stand. I can't do any further masking of the bottom of the fuselage until the sanding of the forward bottom is complete. Right now Michigan is enduring a heat and humidity wave. With booth conditions at 80 degrees and 85% humidity, I dare not do any metal prep work now.
Hopefully conditions will improve within the next few days and let me get started on painting. Too much time had already been wasted this year; I can't afford to waste any more. The fuselage has to get done soon so I can get it out to the hangar. I'm getting the impression that just getting ready to paint the wings will require a lot of extra work figuring out how to jig them for the job, and I'm hoping I can get them both in the booth at the same time. After that, there's a ton of other parts that will need paint - ailerons, flaps, cowling, canopy skirt, wheel pants, intersection fairings, wing tips, inspection covers, etc. The engine will be installed on the fuselage at the hangar when the rebuild is complete; I don't yet know when that will be. There will be some fabrication and finishing that will have to happen at the hangar, most notably the empennage fairing. Final assembly is going to be a long and complicated process. I'm still hoping to fly this year, but there is a LOT of work to do. While I'm waiting on the weather, I might get started on figuring out those wing jigs. We'll see... stay tuned!









No comments:
Post a Comment